I have to confess to being a tool buyer. I’ve generally found the sooner you buy tooling the sooner it pays for itself and generally it always does.
For me the lathe was always a desire. When it came to building my jig it meant I could build a custom one rather than forking out on prebuilt one or someone else making the round bits.
I also have a full time day job, so getting to machine shops during the week is never easy and I love the chance of learning some new skills. It also just opens up a whole lot of other jobs that are impossible without the right tools.
Two words of warning – 1. the swarf that comes off a lathe can chop some fairly large holes in soft flesh and fire small, normally hot pieces of metal at you faster than you can blink. It’s a good idea to get some instruction, always wear safety glasses, use the safety features and don’t stick your hand near the roundy roundy bits until they’re not moving. 2. This stuff is addictive. You will be inventing reasons to use it and it can swallow a whole bunch of time.
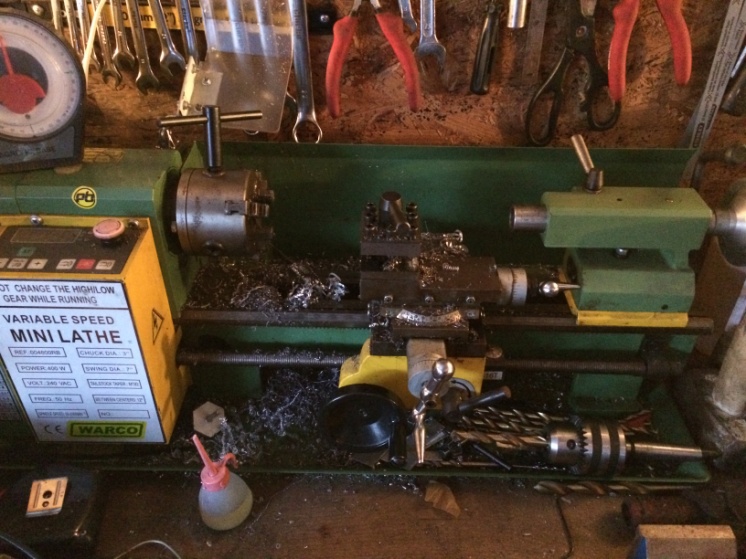
In terms of size, I have pretty limited space so thought as most of the stuff I would be doing would be pretty small a mini lathe would do. I chose a one from Warco.co.uk. They are pretty close to home and seemed reasonable quality, so went to one of their open days and picked up a pretty clean second hand mini lathe for about £250 (about half price). Having zero experience I went to have a little play with my brother full size job to learn some basics.
As a minimum you need a space about 800mm * 300mm to fit this in.
As it happens one of the first unseen jobs that came along was some spacers for my cars suspension which of course were too big for the mini lathe. In hindsight I should have got the bigger one. They can do small stuff and are more man for the bigger jobs. They do cost at least twice as much so I’m happy enough for now.
What can you do with a lathe? Basically a lathe can change the size and shape of round stuff (rods). Turning them down in size, centre boring them and boring hole out up the centre of them. Profiling the shape or putting a texture onto them (knurling). You can also make square bar round, cut threads and various other things if you got a way of holding it. The lathe has a large chuck like an electric drill. You put the job in there, it spins round and a stationary tool takes bits off. Creating swarf and heat. It’s good to have some cutting fluid to keep things cool and stop tools blunting so quickly.
They can be adjusted for speed (either electronically or with pulleys and belts) and direction of rotation and they should have a big knob to turn it off quickly in an emergency.
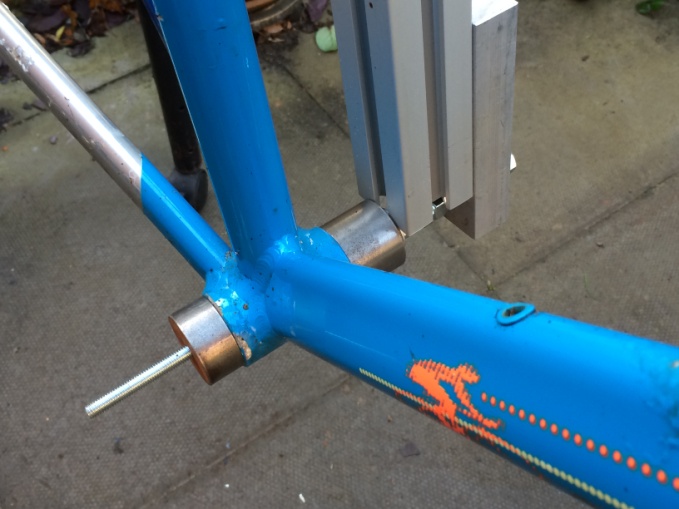
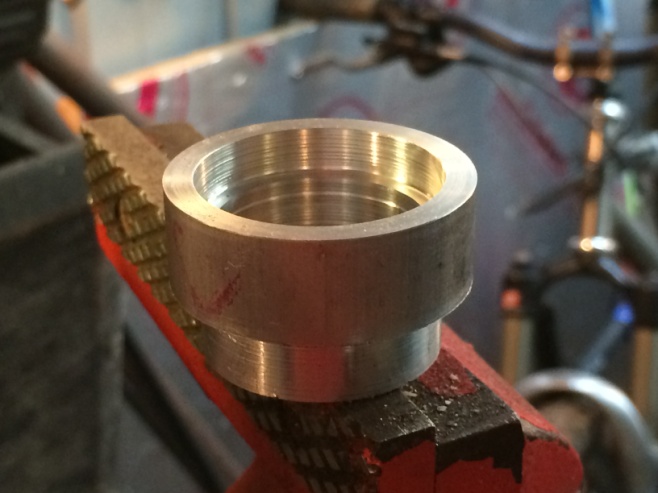
My first jobs were making a mount for the bottom bracket and some ‘cones’ for the top and bottom of the head tube and top of the seatpost to hold them in the jig.
I bought a metre of 40mm steel rod to do both. As Well as the lathe itself there are a number of basic tools needed.
Some cutters – for turning down bars of material. They can be indexed, with a replaceable tip, or not. From my experience indexable are better quality and last a lot longer.
Parting tool – for cutting through the job. Not the easiest thing to get a nice cut on a mini lathe, depending what you’re cutting. Sometimes easier, if you can, to hack saw it off (not in the machine) and then tidy the end up with a turning tool. For the 40mm steel I used a chop saw which was considerably easier that either of the above and gave a pretty clean result.
Drill chuck – so you can drill a hole up the middle of a bar. There is a movable stand at the opposite end of the lathe to the chuck. This has a hole up it to accept an arbour – these can be of different sizes so make sure you get the right one. It also offers ways of stabilizing the other end of the job if it’s quite long. A mini lather has about 30cm working range.
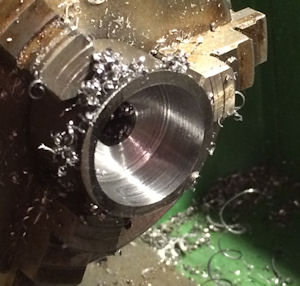
Boring tool – they are really interesting! You can increase the size of the whole you’ve just drilled.
Dial gauge and stand – or some other way of checking the job is in centrally and straight. Align the dial gauge to the side of the job. As it rotates when the dial gauge doesn’t move then it’s centred. If it does, with a little tension out of the chuck give it a tap to centralise it. It can take a few goes but vital particularly if you have to take the job in and out of the lathe.
You’ll also need various ways of measuring things –steel ruler and calipers, depth gauge maybe.
The tools are clamped in the tool stand. The tools can be of different sizes/thicknesses so you need to get the right size for your machine. There are lots of other tools and add-ons for special jobs – turning curves, ball ends etc.
For setup, the tool has to hit the job in the centre on the side closest to the tool and the lathe has to be turning in the right direction. Check how fast it should be going for the type of material (generally fast than you think), apply some cutting fluid and off you go! Always remember you can’t add material back on so best to go steady. If you try to take too much off at one go, the job could move, the tool could break or it will all come to a mighty stop. Generally you can tell because it doesn’t feel right and makes the sort of noise that makes you think something is wrong. On larger machines you can take more off in one go.
Another handy thing you can do is change the angle of attack of the tool so the run of the tool isn’t parallel to the job. This means you can create cone shapes. This is what I wanted to do for the frame jig but that’s another story.
The things I’ve made so far with it have been parts for the frame jig, dummy headset, various spacers/washers, new pivot for the one that broke in my Tern folder, plastic guide wheels for my recumbent, dropouts for my truss fork, as well as modifying any number of things to be in some smaller or more cavernous than they were.
As you start it’s worth getting some plastic bar or aluminium to practice with. It’s a lot easier than steel and kinder on tools to learn with.
It’s undoubtedly paid for itself already and it’s addictively good fun!
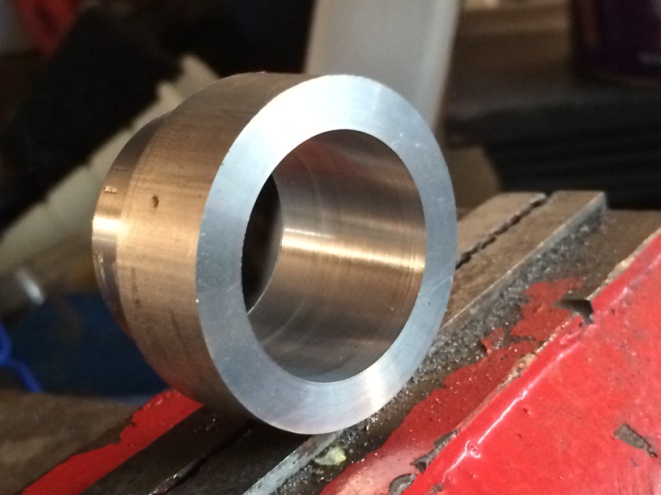
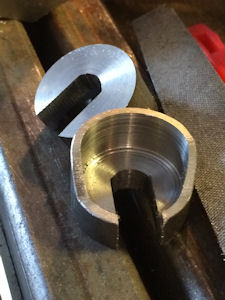
Dummy Headset spacers
Truss Fork dropouts
Handlebar spacer

